

Snowpipe: Automated Ingestion and Event Notification Workflow
Snowpipe provides a serverless, automated ingestion mechanism that loads new files into Snowflake tables as soon as they arrive in cloud storage. This part focuses on the detailed event-notification setup, Snowpipe ingestion behavior, duplicate file handling, monitoring options, and key operational considerations exactly as presented in the source.
AWS S3 Event Notification Configuration

Flow Chart to create AWS S3 Event Notification
Why Do We Need AWS Event Notification for Snowpipe?
Because Snowpipe doesn’t automatically know when a new file lands in your S3 bucket.
? So how does it know?
By using S3 Event Notifications, which trigger a message to an SNS or SQS topic, which Snowflake listens to.
What Happens Without It?
- You would need to manually call COPY INTO or a Snowpipe REST API to load data.
- No real-time or automated ingestion — not ideal for streaming-style data pipelines.
✅ What AWS Event Notification Does:
- You upload a file (e.g., data_2025_07.csv) to your S3 bucket.
- S3 Event Notification is triggered.
- It sends a message to an SNS or SQS queue (configured to notify Snowpipe).
- Snowpipe receives the message and automatically loads the file into Snowflake using the defined file format and stage.
Event notifications enable Snowpipe to ingest files automatically. When a new file is uploaded to an S3 bucket, AWS generates an event and sends it to an SNS topic or SQS queue. Snowflake listens for these notifications and triggers the Snowpipe COPY command.
Below are the steps involved in configuring AWS event notifications for integration with Snowpipe.
Step-by-Step Event Notification Setup
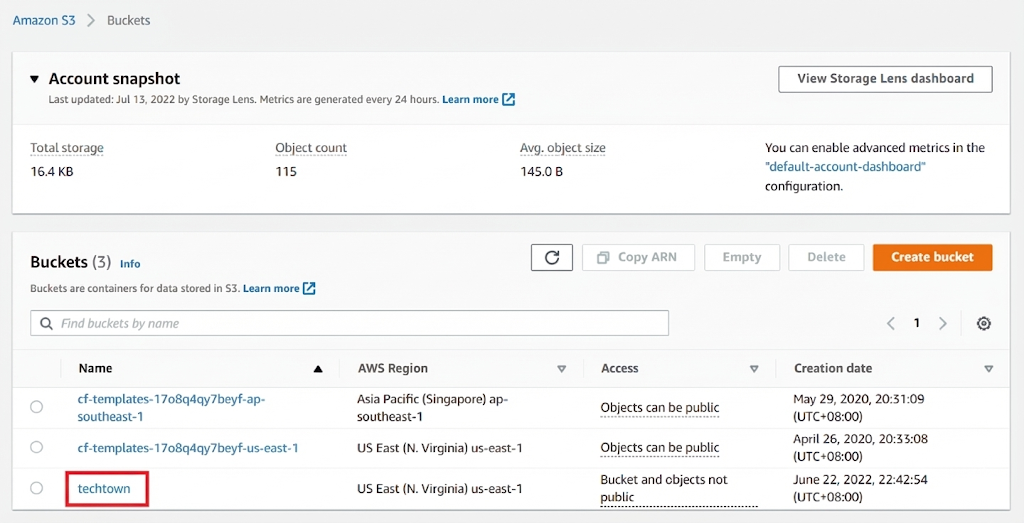
1. Navigate to AWS S3 Bucket
Open the S3 console and select the bucket that contains the data files intended for ingestion.
2. Access the Properties Section
Once inside the bucket, go to the Properties panel and scroll down to find the Event Notifications section.
3. Create Event Notification
Click Create Event Notification and configure the following:
- Event Name: Provide a recognizable name.
- Event Types: Select the event type PUT (indicates new file uploads).
- Prefix/Folder Selection: Choose the folder path where new files arrive.
- Destination: Select SNS Topic or SQS Queue.
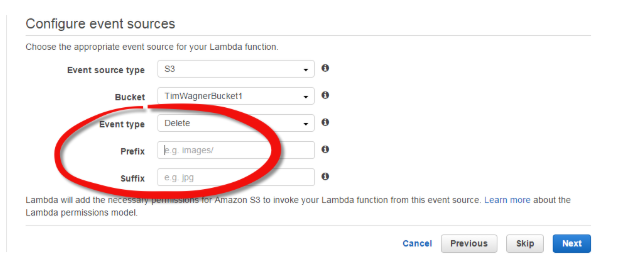
Configuration panel showing event name, suffix matching, folder prefix selection, and destination type
Generate S3 Bucket ARN
Copy the ARN displayed:
arn:aws:s3:::ecomproject-s3-bucket/sales-data/superstore/
This ARN is required when mapping S3 event notifications to Snowflake’s pipe definition.
ARN field displaying a complete S3 bucket ARN used for event mapping
Create SNS Topic
- Navigate to Amazon SNS.
- Choose Topics → Create Topic.
- Select Standard Topic.
- Name the topic and create it.
A confirmation displays the SNS Topic ARN, such as:
arn:aws:sns:ap-south-1:810855409545:snowflaketopic
Copy this ARN for the event notification configuration.
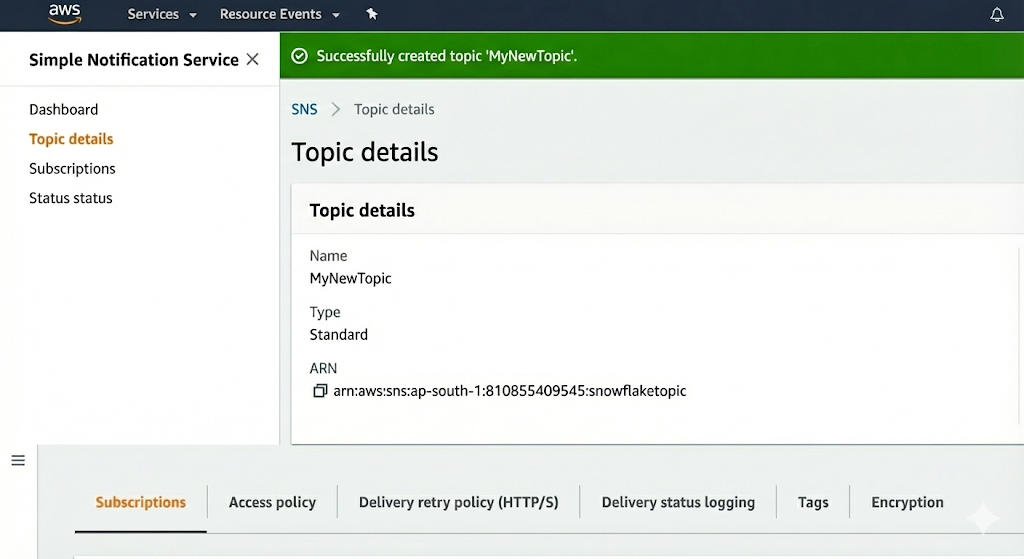
SNS creation panel showing topic type, topic name, and ARN displayed upon successful creation
Create SQS Queue
- Navigate to Amazon SQS → Create Queue.
- Select Standard Queue.
- Provide a queue name and create it.
The SQS Queue ARN appears in the queue details:
arn:aws:sqs:ap-south-1:810855409545:snowflakequeue
Copy this ARN for use in Snowflake.
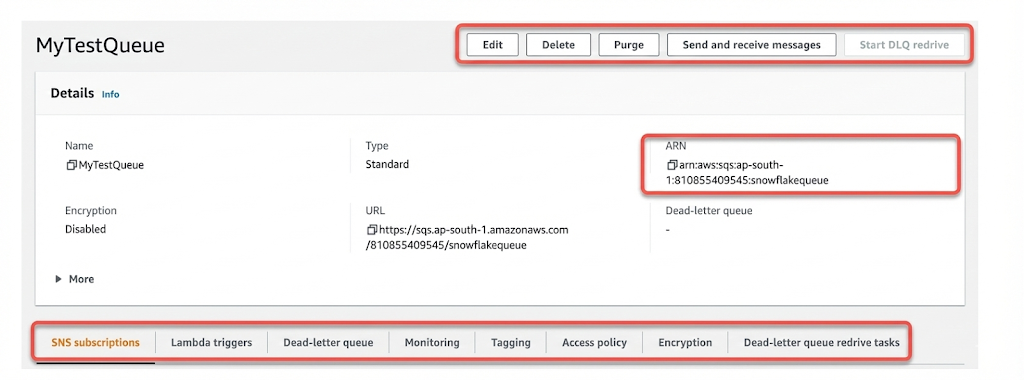
Queue creation section showing queue name entry and ARN visible under queue details
Subscribe SQS to SNS Topic
- Go to the SNS Topic details page.
- Select Create Subscription.
- Choose Protocol: Amazon SQS.
- Provide the SQS Queue ARN.
- Create the subscription.
SNS now passes S3 file upload events into SQS, ensuring Snowflake receives notifications promptly.
Configure Snowpipe Notification Channel
Snowflake must be configured to listen to the SNS/SQS notifications.
Show Pipe Details
SHOW PIPES;
This displays:
- Notification Channel ARN
- Integration Name
- Pipe Name
- Pattern Matching Rule
- Creation Timestamp
The Notification Channel ARN appears as:
arn:aws:sns:ap-south-1:810855409545:snowflaketopic
Map S3 Events to Snowflake Notification Channel
Return to the S3 properties → Event notifications and configure:
- Event Type: PUT
- Destination: SNS Topic
- SNS Topic ARN: The ARN matching Snowflake’s notification channel
This ensures all S3 PUT events are passed to Snowflake through the defined SNS → SQS route.
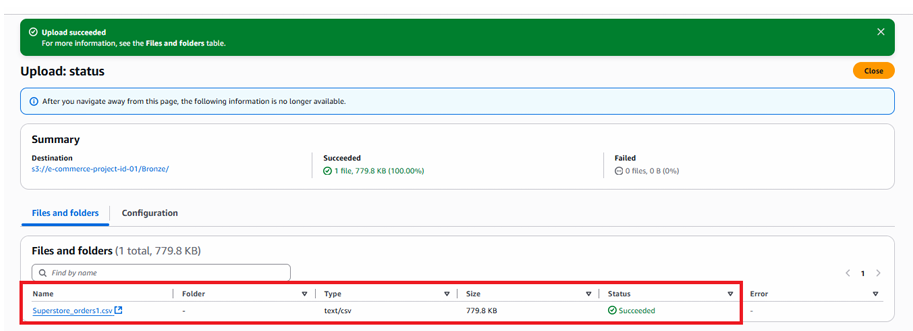
Testing Snowpipe Ingestion
Once the event pipeline is configured, upload files into the S3 folder.
Test File Upload
When a file is uploaded:
- S3 emits an event
- SNS receives and distributes the message
- SQS forwards it to Snowflake
- Snowpipe starts ingesting file contents
Monitor Pipe Activity
SELECT SYSTEM$PIPE_STATUS('raw_sales_data_pipe');
This returns:
- Number of outstanding files
- Time since last ingestion
- Average ingestion latency
- Current pipe state
[Image Description: Output of SYSTEM$PIPE_STATUS function listing file count, ingestion time, and pipe health metrics.]
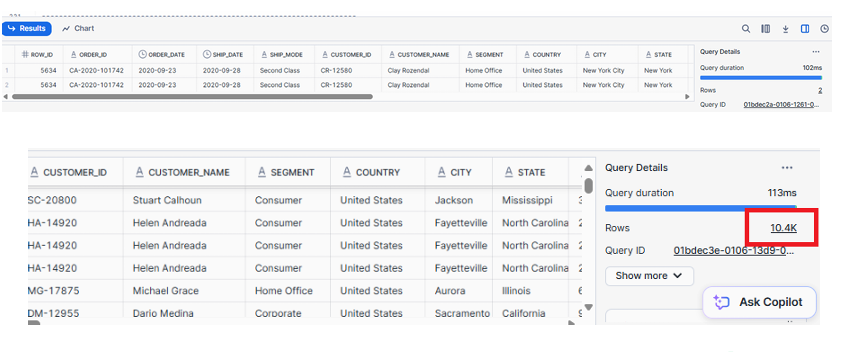
Verify Data Load
Query the raw table to confirm successful ingestion:
SELECT COUNT(*) FROM ecomproject.sales.superstore_orders_raw;
Uploaded files should appear in the table almost immediately after arrival in S3.
Understanding File Metadata Tracking
Snowpipe uses file metadata to prevent duplicate ingestion. Once a file is loaded, Snowflake records the filename in metadata. Re-uploading a file with the same name will not trigger another load.
Duplicate File Behavior
- If a file shares the same name, Snowpipe ignores it.
- If the file name is different, Snowpipe loads it—even if contents are identical.
This ensures idempotency while providing flexibility for incremental loads.
highlighting behavior of Snowpipe when duplicate filenames are detected
Handling Errors During Ingestion
When Snowpipe encounters malformed rows or data format mismatches, the COPY statement inside Snowpipe determines how errors are handled.
ON_ERROR = 'CONTINUE'
This setting ensures:
- Valid rows load successfully
- Problematic rows are skipped
- Error files and logs remain available for debugging
To inspect recent load history:
SELECT *
FROM TABLE(INFORMATION_SCHEMA.LOAD_HISTORY_BY_PIPE(
PIPE_NAME => 'RAW_SALES_DATA_PIPE'));
Monitoring and Observability Tools
Snowflake provides detailed metrics to track Snowpipe ingestion:
1. Pipe Status
SELECT SYSTEM$PIPE_STATUS('RAW_SALES_DATA_PIPE');
2. Load History
SELECT * FROM INFORMATION_SCHEMA.LOAD_HISTORY;
3. Pipe-Level Load History
SELECT *
FROM TABLE(INFORMATION_SCHEMA.LOAD_HISTORY_BY_PIPE(
PIPE_NAME => 'RAW_SALES_DATA_PIPE'));
4. Pipe Retry Metrics
SHOW PIPES;
These tools help validate ingestion completion, detect failures, and analyze file processing latency.
Snowpipe Architecture Summary
Snowpipe provides a scalable, event-driven data ingestion mechanism built around:
- S3 Event Notifications
- SNS Topic Publishing
- SQS Queue Delivery
- Snowflake Notification Channel
- Automated COPY Execution via Pipe
- Metadata-driven deduplication
- Continuous Monitoring Functions
- see first diagram of the article.
Key Operational Considerations
File Size Optimization
- Use 100–250 MB files for optimal ingestion and cost efficiency.
Compression
- Prefer gzip or similar compression formats to reduce transfer time.
Naming Standards
- Use consistent, chronological naming conventions for predictable ingestion.
Pipe Isolation
- Use separate pipes for different domains or data sources.
Error Handling
- Configure
ON_ERRORbehavior carefully depending on quality assurance needs.
Events Setup
- Ensure accurate prefix and suffix rules to avoid unwanted or missed ingestions.
Conclusion
Snowpipe delivers automated, continuous, serverless ingestion of files from cloud storage with minimal operational overhead. By configuring event notifications, defining storage integrations, creating external stages, and setting up the pipe correctly, data flows into Snowflake within minutes of arrival. Monitoring tools, file metadata management, and error-handling options ensure a reliable and scalable ingestion pipeline suitable for real-time analytical workloads.