

Configuring Azure ADLS Permissions for Snowflake Storage Integration
A complete guide to granting Snowflake secure access to Azure Data Lake Storage.
Once the Storage Integration object has been created in Snowflake, the next phase is enabling Azure to trust Snowflake and granting the correct permissions for accessing ADLS containers. This step ensures that Snowflake can read and write data securely without using access keys, relying instead on Azure identity and role-based access control.
The following walkthrough covers consent, IAM role assignment, and service principal authorization.
Step 1: Provide Consent to the Storage Integration
Snowflake requires explicit Azure consent before it can interact with ADLS. This consent authorizes Snowflake’s service principal to operate within the tenant and perform storage-level actions.
How to Grant Consent
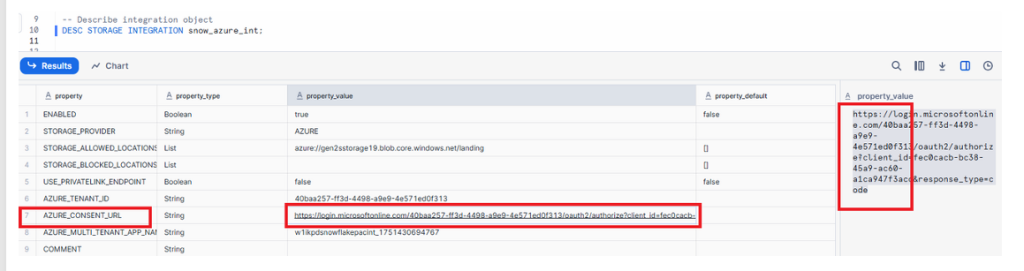
- Run the describe command in Snowflake:
DESC STORAGE INTEGRATION snow_azure_int;
- Identify the consent URL provided in the integration properties.
- Copy the URL and paste it into your browser.
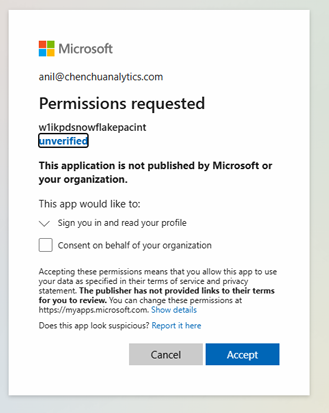
- A Microsoft permissions page will appear. Approve the request to allow Snowflake to integrate with your ADLS environment.
This step formally registers Snowflake’s identity within your Azure tenant.
Microsoft Entra permission request window for granting the Snowflake integration application access to Azure resources.
Now copy & paste the bove link in your bowser and accept as shown in below diagram:
Step 2: Assign the Storage Blob Data Contributor Role
Azure requires roles to be assigned at the storage account or container level so Snowflake can read and write files. The correct RBAC role for Snowflake is Storage Blob Data Contributor.
How to Assign the Role
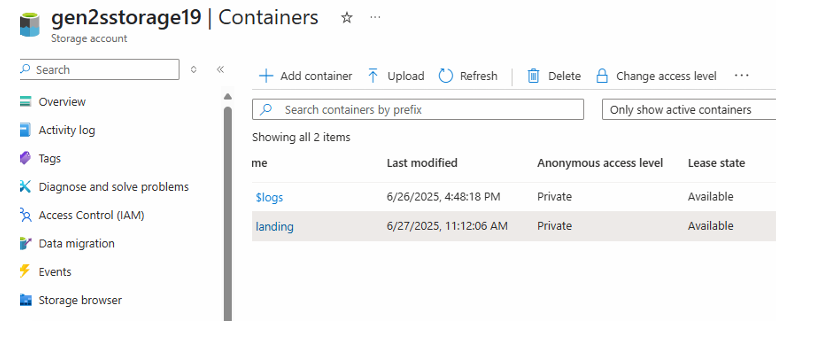
- Open the Azure Storage Account.
- Go to Containers.
- Select the desired container.
- Open Access Control (IAM).
- Click Add Role Assignment.
- Search for and select Storage Blob Data Contributor.
- Proceed to the next step to choose members.
This role allows Snowflake to manage blobs inside the container but does not provide administrative privileges.
Go to storage account ⟶ container –-> Click on Access control IAM (on left panel)
Add role assignment:
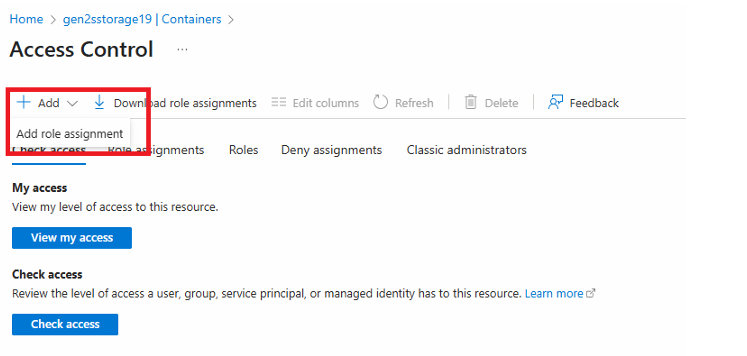
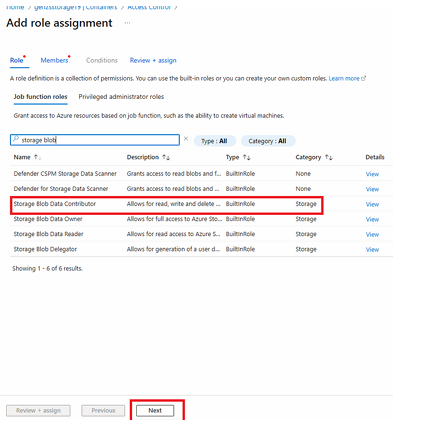
IAM panel showing the Add Role Assignment dialog and the Storage Blob Data Contributor role highlighted.
Search for storage blob data contributor and click Next:
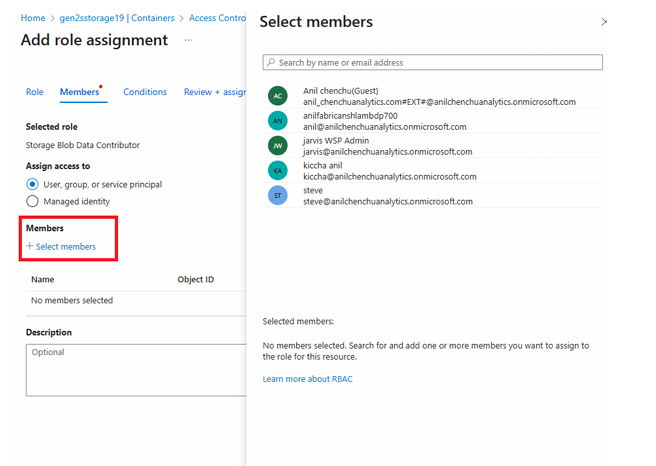
Now click on Members & Select Members:
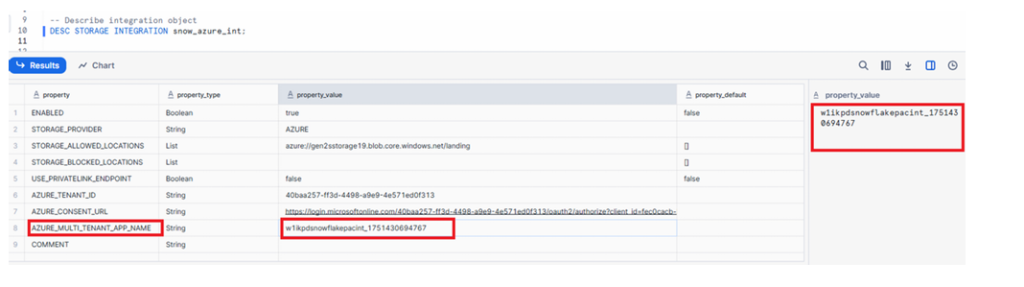
Now go to snowflake & run below command in snowflake & copy property value:DESC STORAGE INTEGRATION snow_azure_int;
Step 3: Select the Snowflake Integration as the Member
Azure must know which identity (service principal) will receive the storage permissions. Snowflake exposes this identity through the Storage Integration properties.
Retrieve the Required Identifier
Run the command again:
DESC STORAGE INTEGRATION snow_azure_int;
Locate the relevant property, such as:
AZURE_SERVICE_PRINCIPAL- or the value associated with the earlier consent URL
This identifier represents the Snowflake-managed application in Azure.
Add the Member
- In the Members selection panel of IAM**, search using part of the service principal ID.
- When it appears, select it.
- Continue to finalize the assignment.
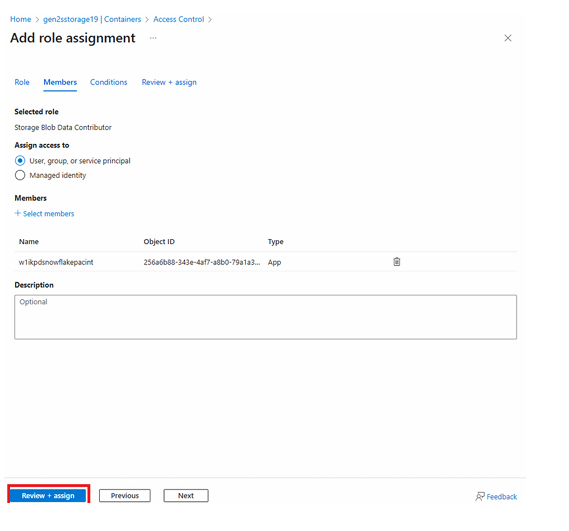
Member selection panel showing the Snowflake application/service principal found through search and selected for role assignment.
Now paste in the search bar as shown below if you are not finding it then put some characters as shown below & then click select:
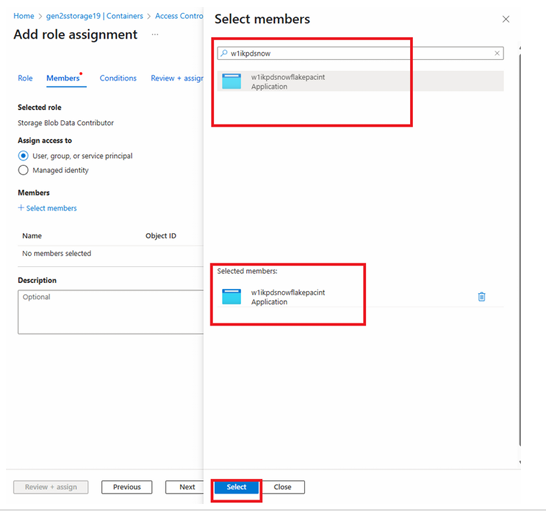
Now click on Next & Click on Review + assign
Step 4: Review and Assign Permissions
The final step is confirming the role assignment so Snowflake can operate on ADLS securely and immediately.
How to Complete the Role Assignment
- Click Review + Assign
- Confirm the settings
- Azure will apply the Storage Blob Data Contributor role to the Snowflake service principal
After this, Snowflake’s integration object officially gains the ability to list, read, and write data inside the selected ADLS container.
Role assignment confirmation panel indicating successful application of permissions and completion of the integration setup.
Now the integration setup has been completed
Conclusion
With consent granted, roles assigned, and the Snowflake service principal authorized, the integration between Snowflake and Azure ADLS is fully established. This configuration allows Snowflake to securely access ADLS containers through the storage integration, enabling external stages, bulk loading, and data movement workflows.
These permission steps ensure:
- Identity-based authentication
- Least-privilege access control
- Secure data interaction between platforms
Once these permissions are in place, you can proceed to create external stages in Snowflake, list ADLS files, and load data seamlessly into Snowflake tables.